How to write your first blog post using the WordPress block editor
A set of training tutorials, examples and how-to's for managing your WordPress website.
OK, so now you are ready to write your first blog post in the WordPress block editor.
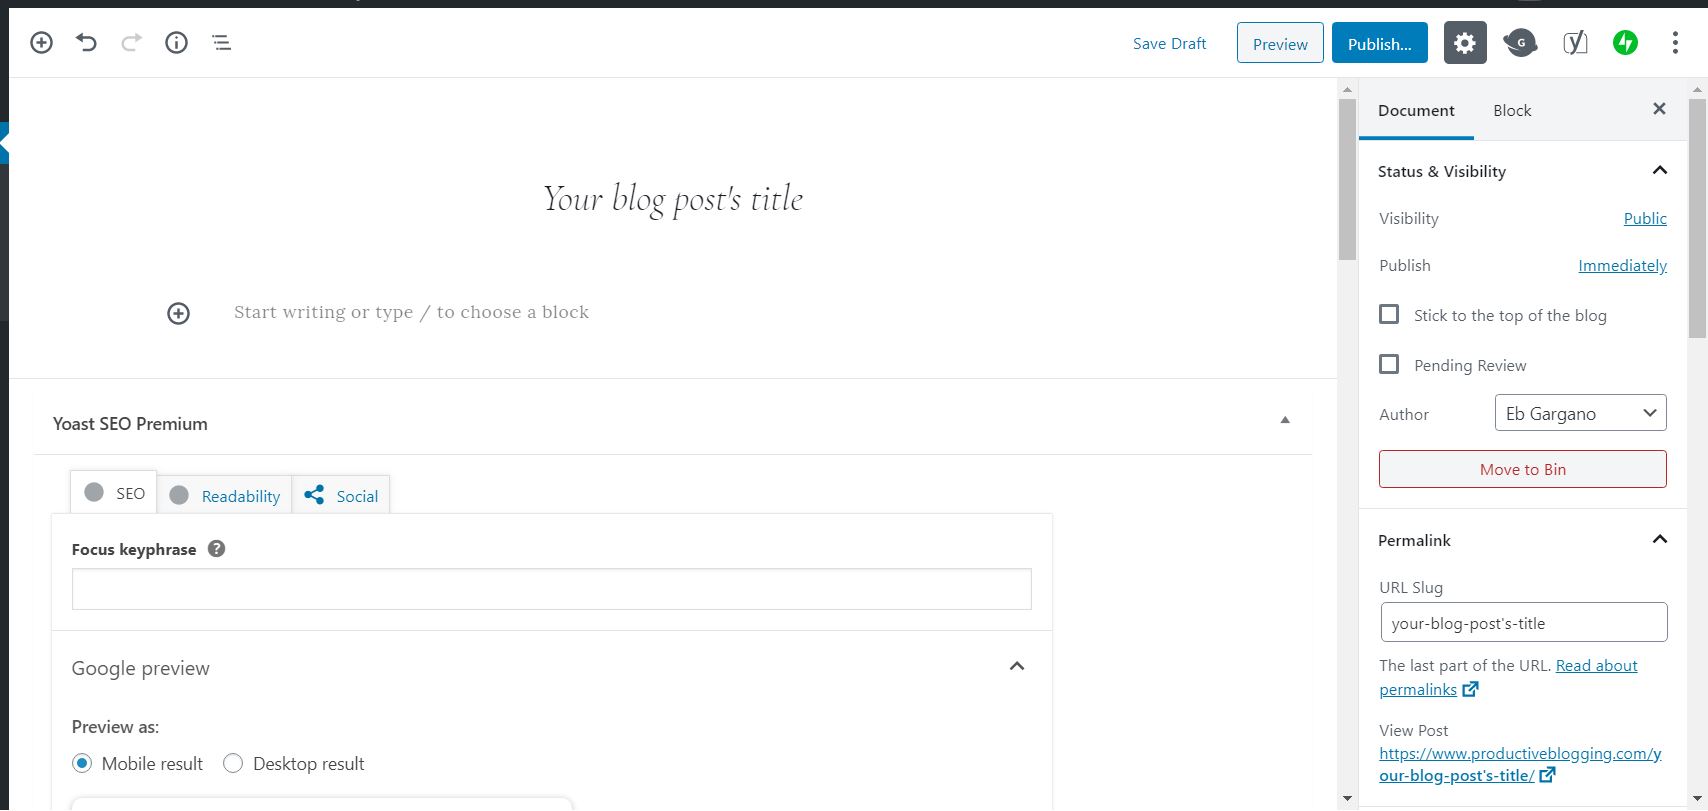
STEP 1: ADD A NEW POST
First, log into your blog’s dashboard and select Posts > Add New. You should get a screen which looks like this –
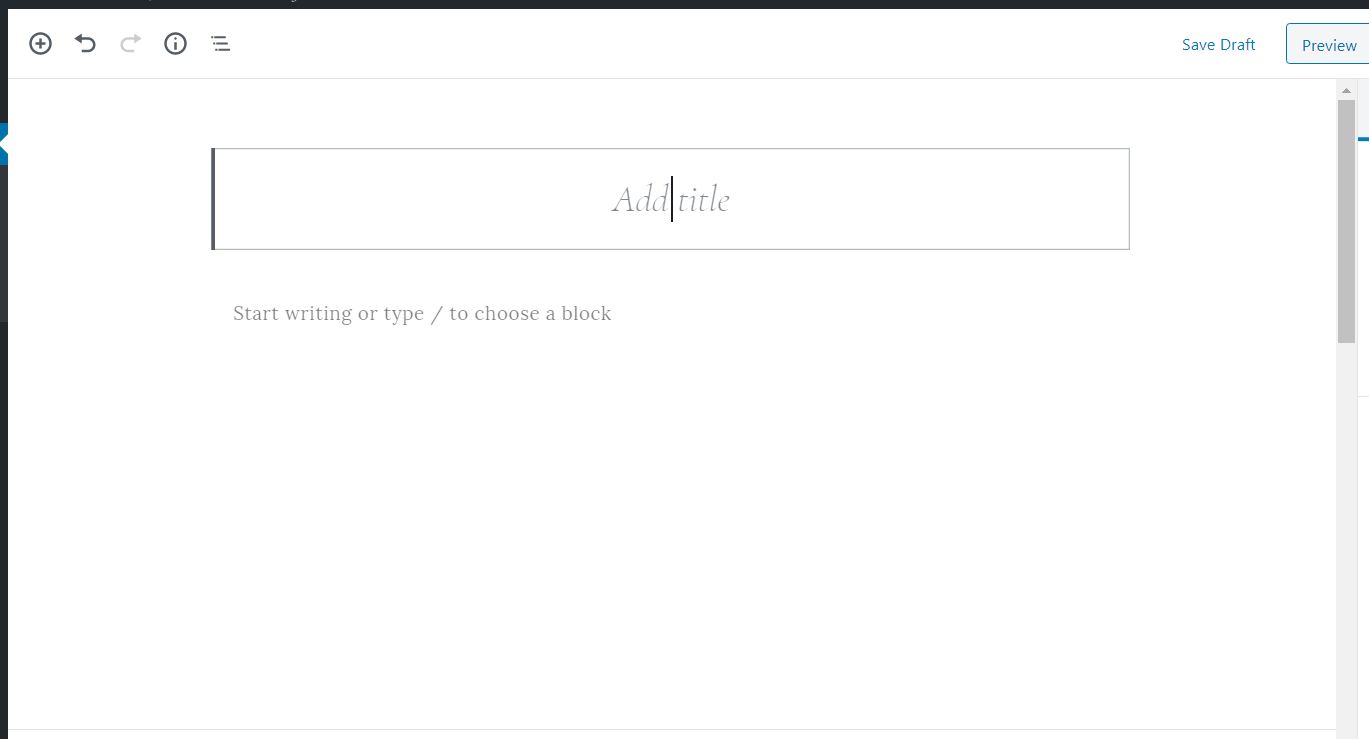
STEP 2: GIVE YOUR POST A TITLE
Simply type in your title where it says Add Title at the top.
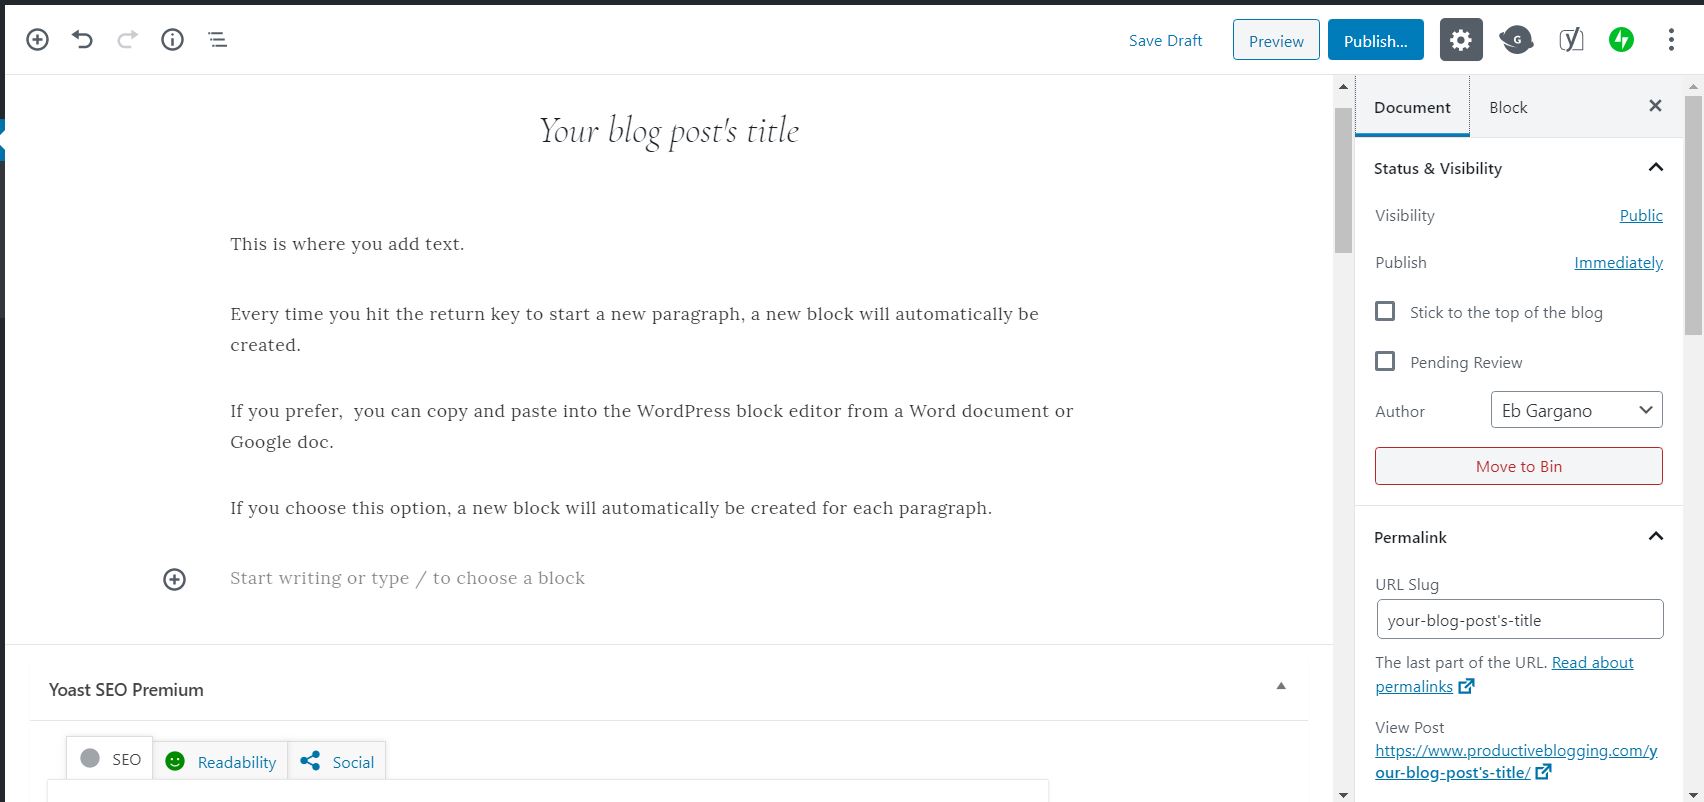
STEP 3: ADD TEXT
To add text, simply type where it says START WRITING OR TYPE / TO CHOOSE A BLOCK. Every time you hit the return key to start a new paragraph, a new block will automatically be created.
Alternatively, you can copy and paste into the WordPress block editor from a Word document or Google Docs document. If you choose this option, a new block will automatically be created for each paragraph.
STEP 4: ADD HEADINGS
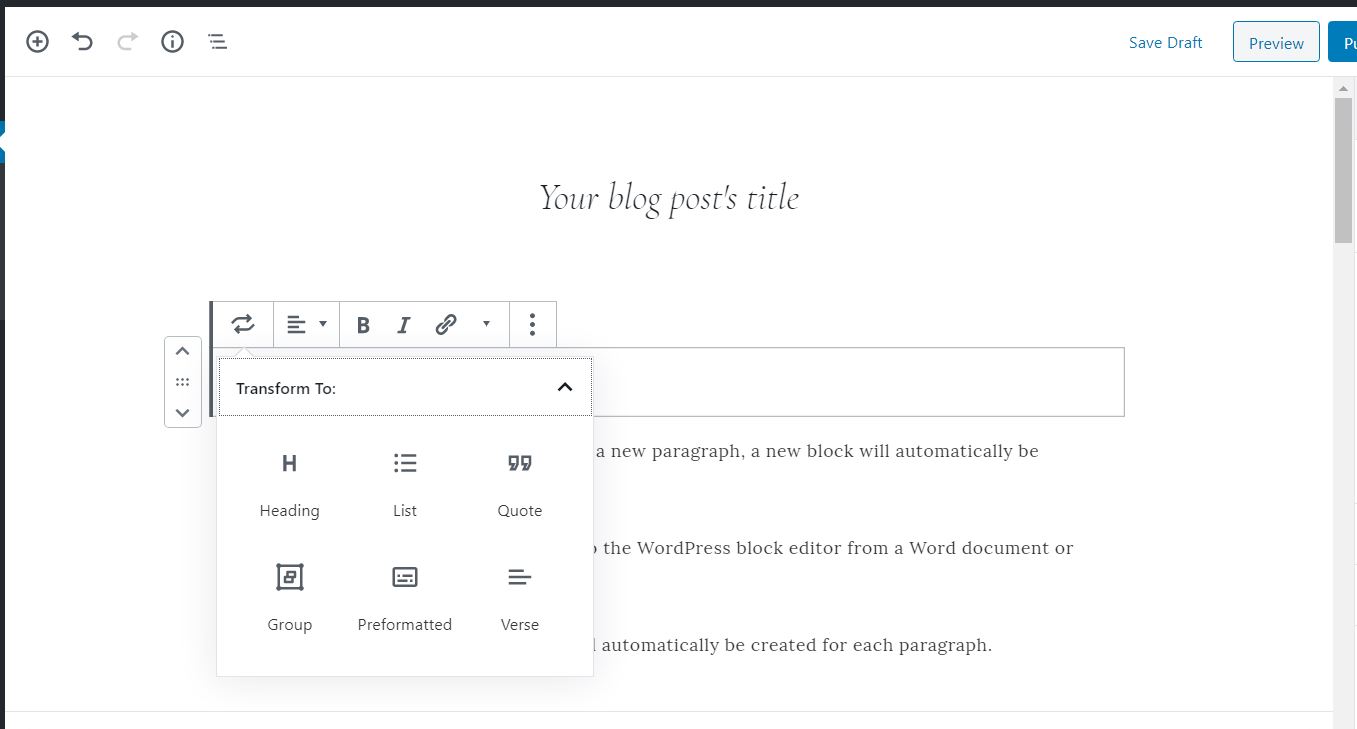
To create a heading, simply type the text of your heading, then select the paragraph symbol (which looks like this: ¶) in the top left of the popup toolbar. This will give you the option to change the text from paragraph text to heading text. Select HEADING.
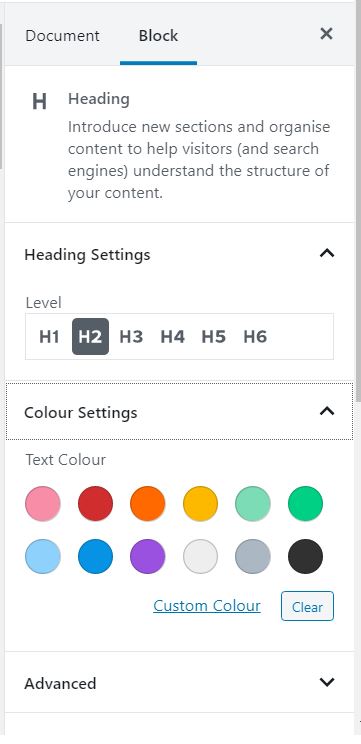
For all your main subheadings you should choose the ‘H2’ H Tag. If you divide a paragraph into sub-sections, each with its own sub-sub-heading, then you need to use H3 tags (and H4 for sub-sub-sub headings!).
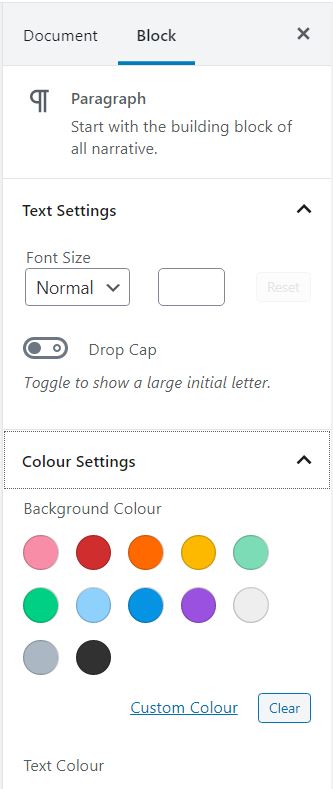
If you want to change the colour of your headings you can do this by clicking on your heading then selecting COLOUR SETTINGS in the right-hand menu
STEP 5: ADD SPACES
To make your text easier and more enjoyable to read, it’s important to include plenty of white space – particularly between sections. Unfortunately, this doesn’t happen as easily in Gutenberg as it does in say Word or Google Docs (or, for that matter, the old classic editor).
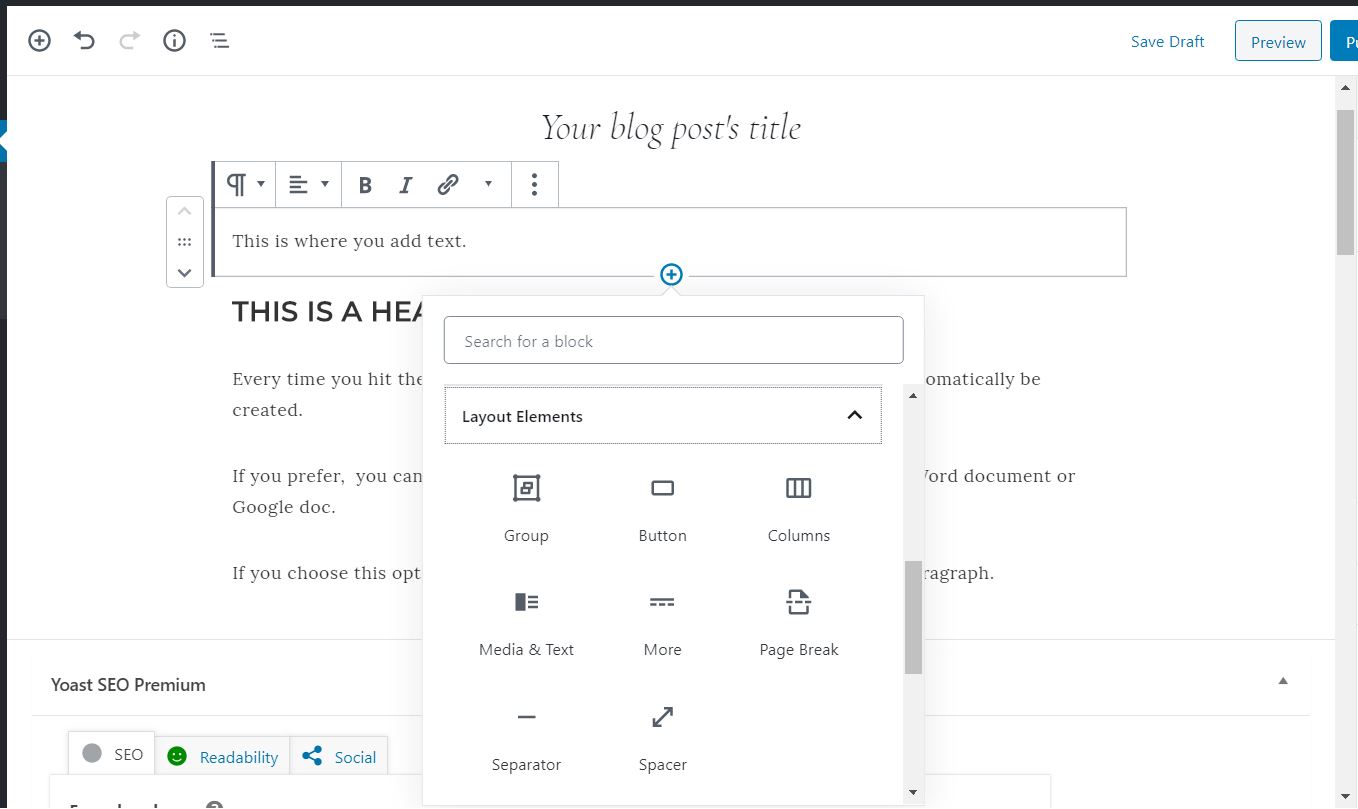
To add in this white space, you need to hover your mouse between the two blocks where you want the white space to go and a + sign should appear.
Click on the plus sign and select LAYOUT ELEMENTS then SPACER.
Now, over on the right-hand menu, change the height of the spacer to 40px.
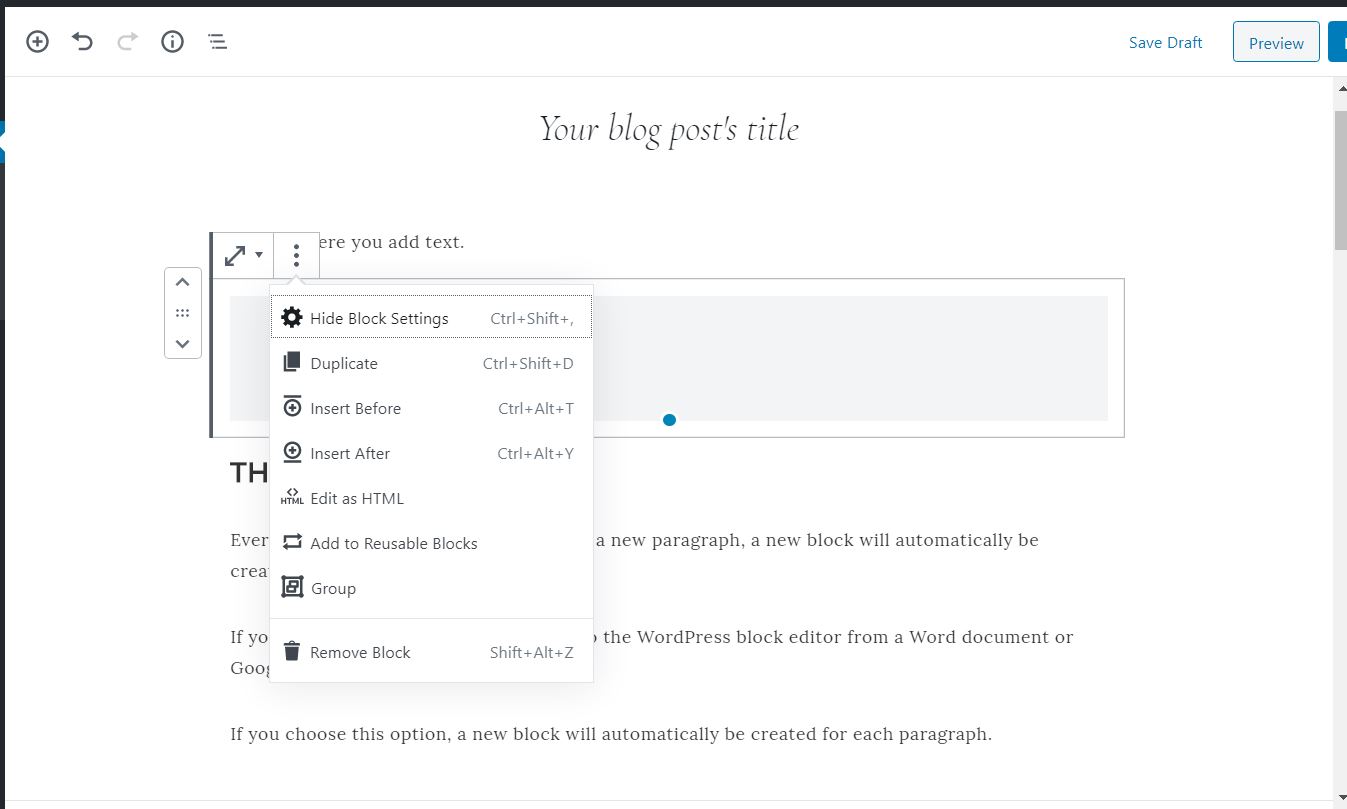
To be able to reuse this 40px spacer, you will need to save it as a reusable block. To do this, go to the three dots above the spacer and select ADD TO REUSABLE BLOCKS. Give your reusable block a name (for example 40px spacer) and hit SAVE.
I like to add a 40px spacer after each main section (immediately above a new H2 heading) and a 20px spacer after each subsection (immediately above a new H3 heading).
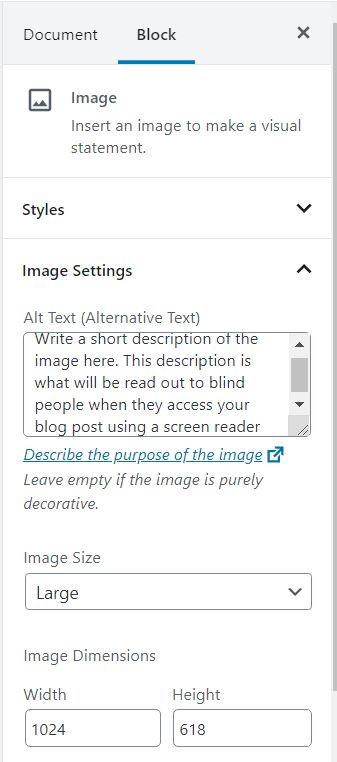
STEP 6: ADD IMAGES
To add an image, hover your mouse between the paragraphs where you want the image to go and click the + sign. Choose COMMON BLOCKS >> IMAGE >> UPLOAD and select a photo from your computer or COMMON BLOCKS >> IMAGE >> MEDIA LIBRARY to select an image from your media library.
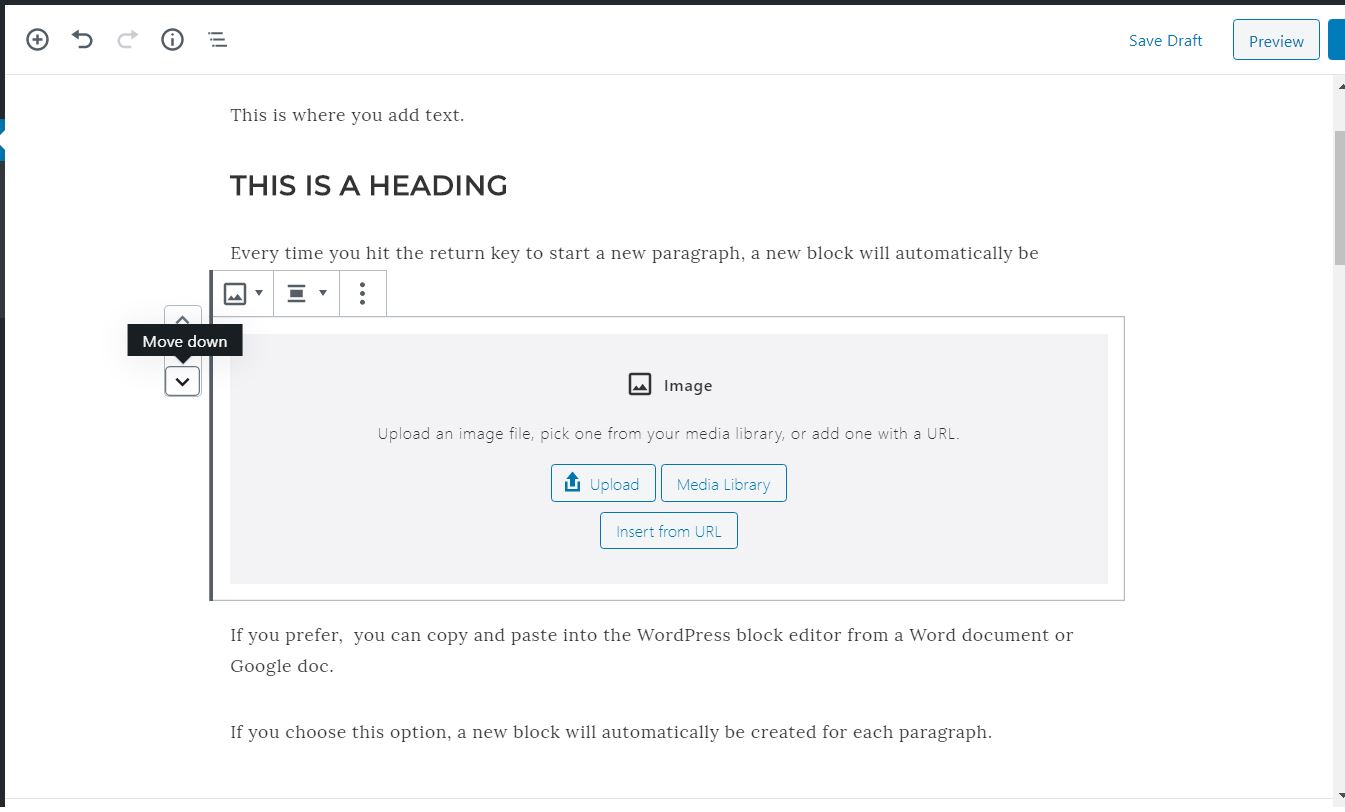
Use the panel on the right to change the size of your image, if you want, and add an alt description.
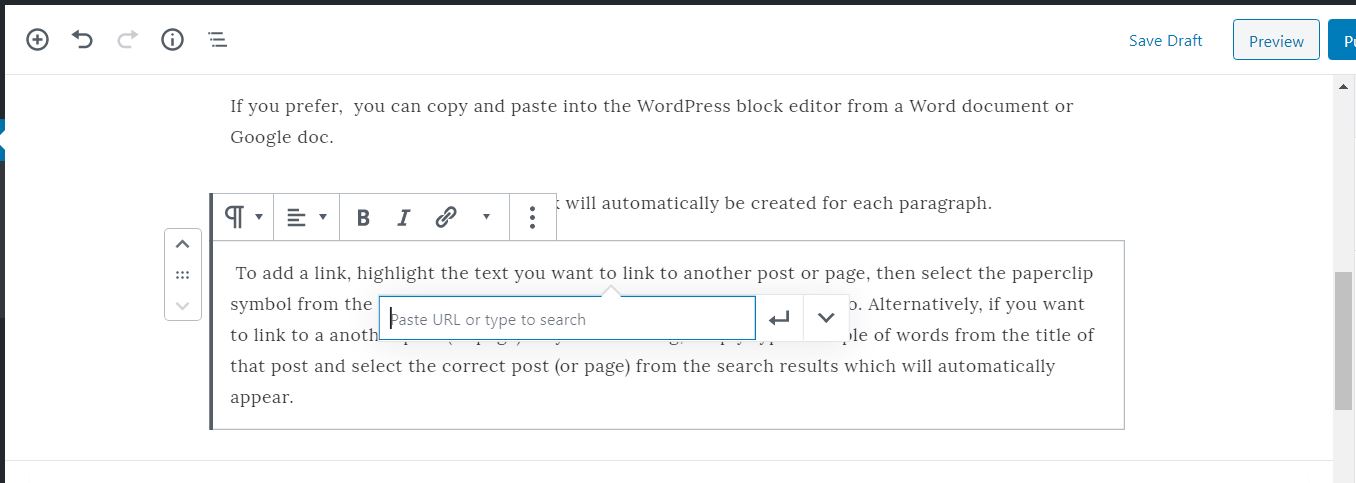
STEP 7: ADD LINKS
To add a link, highlight the text you want to link to another post or page, then select the chain link symbol from the popup toolbar and paste in the URL you want to link to. Alternatively, if you want to link to a another post (or page) on your own blog, simply type a couple of words from the title of that post and select the correct post (or page) from the search results which will automatically appear.
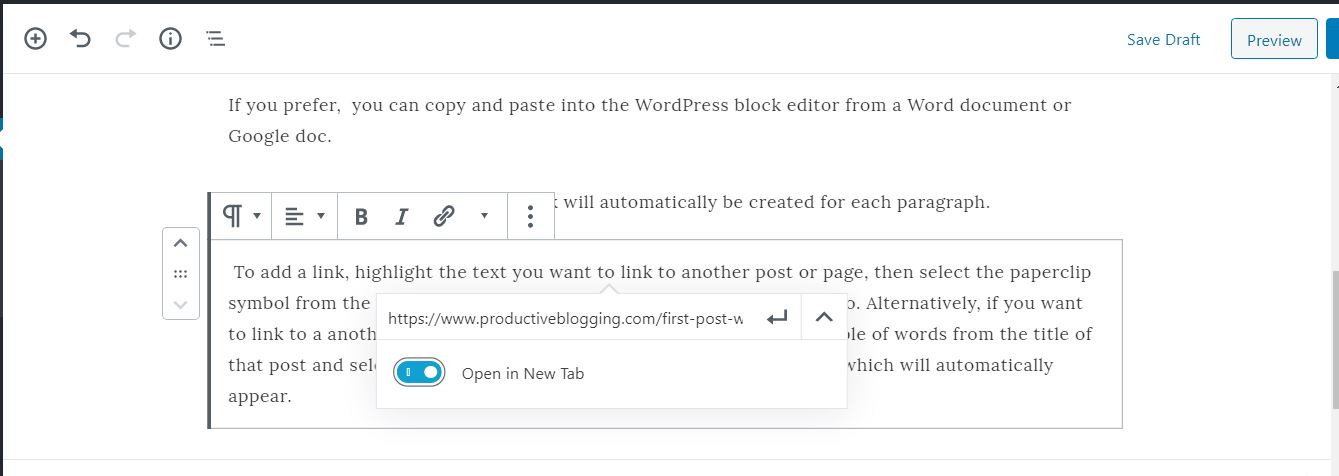
To make the link open in a new tab, click the down arrow next to the URL and toggle OPEN IN NEW TAB to ON.
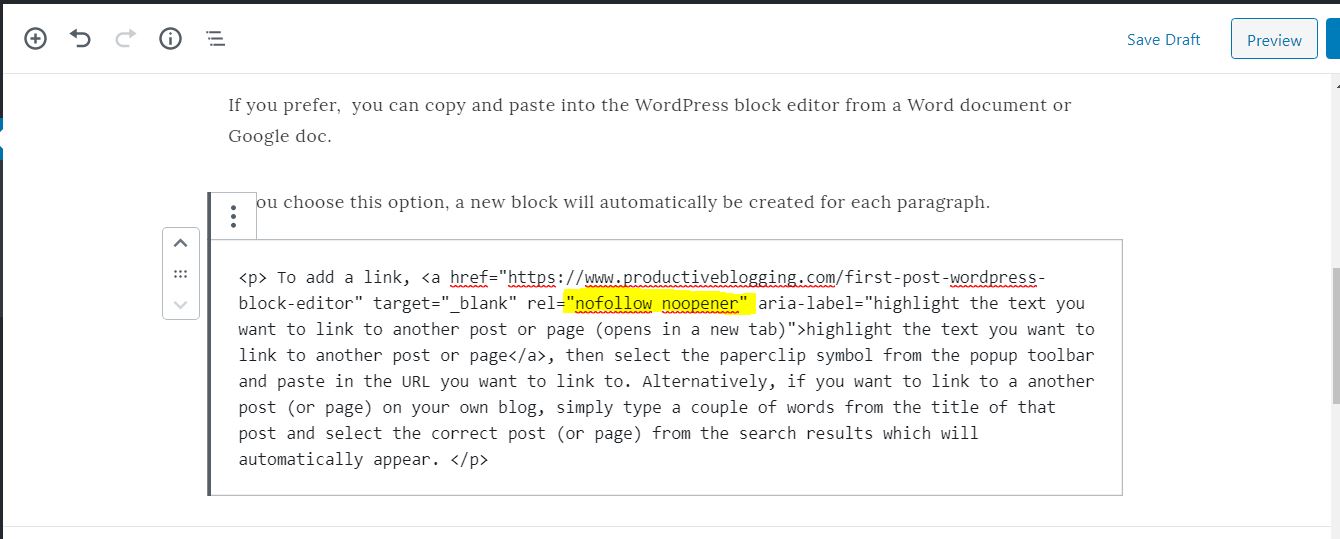
To set the link to nofollow, first ensure you have set the link to open in a new tab, then click the 3 dots in the popup toolbar that appears and choose EDIT AS HTML.
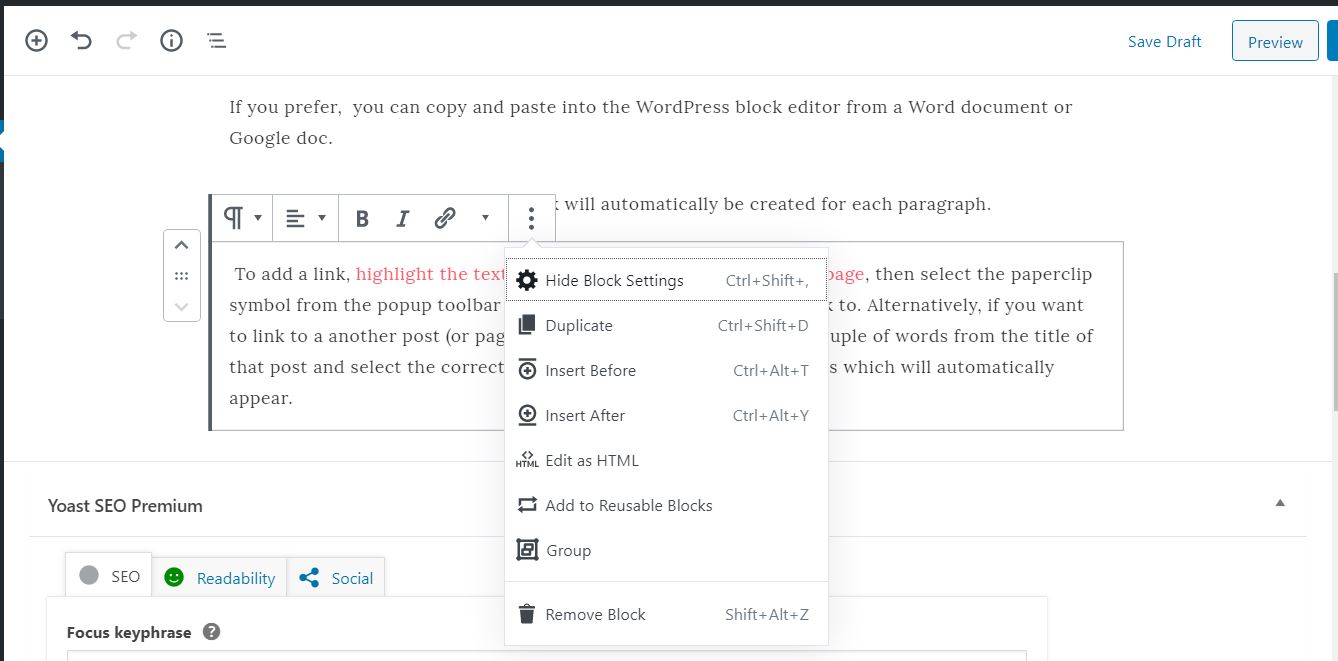
In the html code find the part that says rel=”noreferrer noopener” and change it to say instead rel=”nofollow noopener”.
Now click the 3 dots again and select EDIT VISUALLY.
STEP 8: ADD BACKGROUNDS
To give a single paragraph a different colour background, simply click anywhere in the paragraph and then select COLOUR SETTINGS on the right-hand menu and choose your colour.
To give a group of blocks a background colour, highlight all the blocks and click on the multiple block symbol in the popup toolbar. Select TRANSFORM TO… GROUP.
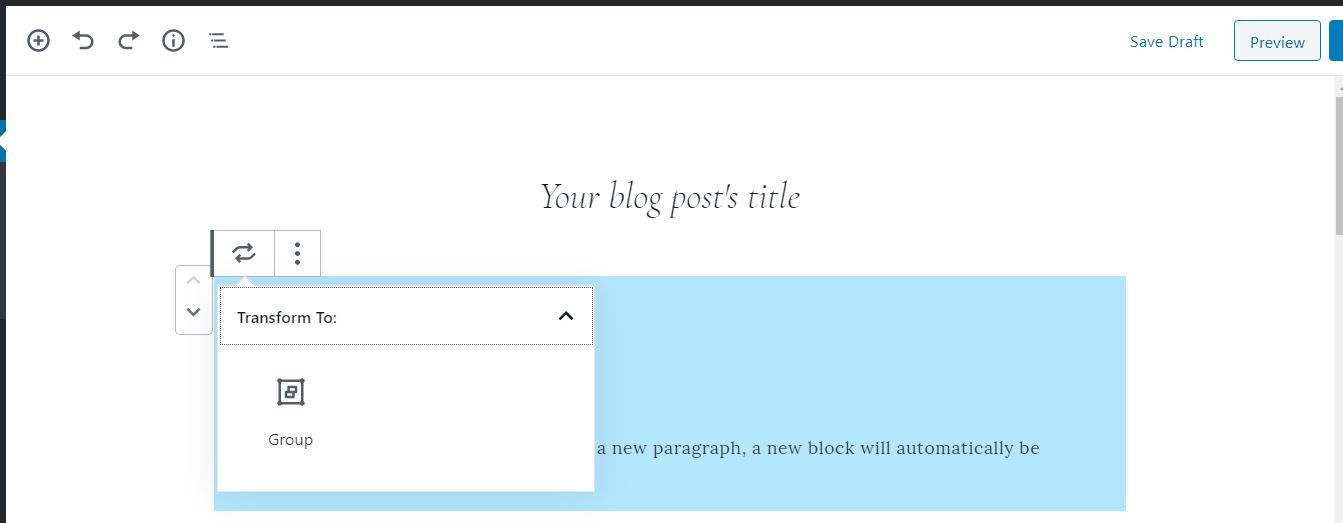
Now select COLOUR SETTINGS on the right-hand menu and choose your background colour.
STEP 9: ADD CODE
If you need to add a line of code into your blog post, simply select the Custom HTML block which you will find under ‘formatting’ in the list of available blocks.
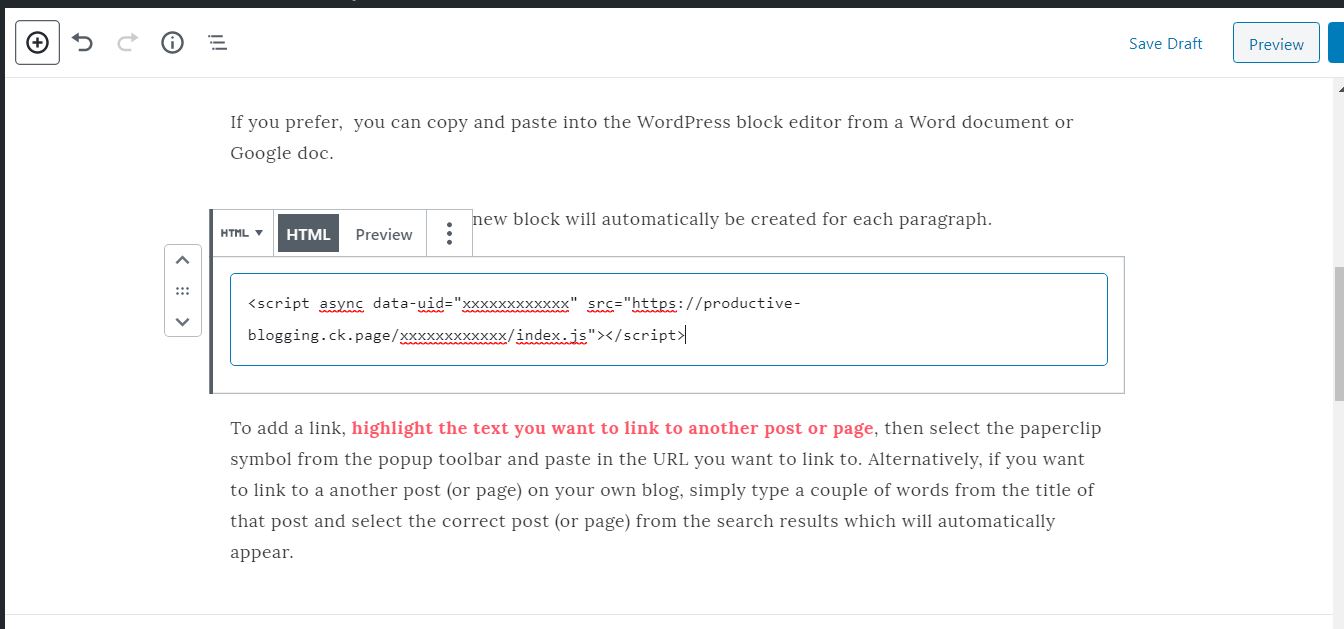
Once you’ve added your custom code, you can click on the preview button to double check it looks right visually.
I use this for things like embed codes for my opt-in forms and affiliate link code.
STEP 10: SET CATEGORIES, TAGS, FEATURED IMAGE AND EXCERPTS
Look over to the right-hand menu and select the DOCUMENT tab.
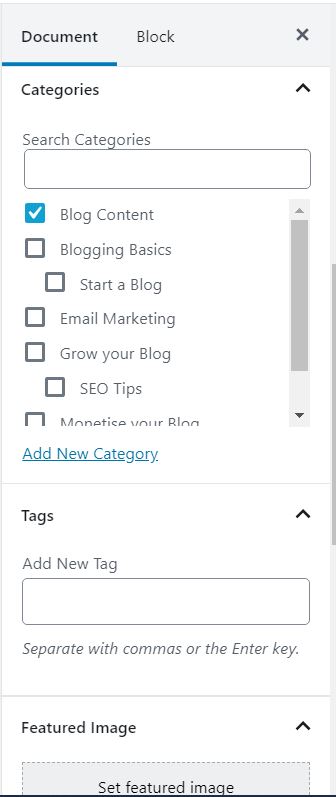
Now scroll down to where it says CATEGORIES and choose the correct category for your blog post.
Scroll just below to where it says TAGS and add your tags.
Next add a featured image by clicking on SET FEATURED IMAGE then selecting or uploading the image you want to use.
Finally, copy and paste your first paragraph into where it says EXCERPT (or write a custom excerpt if you prefer).
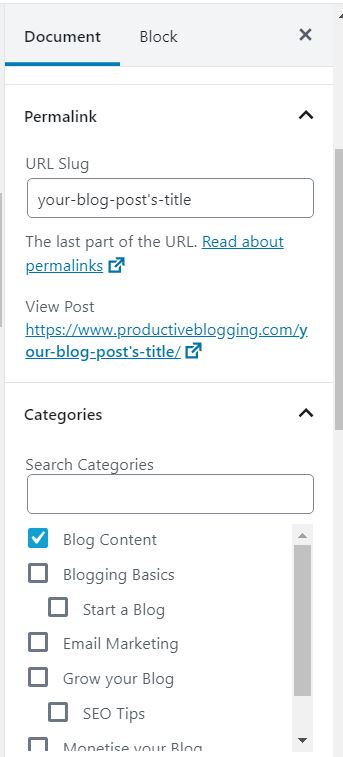
STEP 11: CHANGE YOUR URL SLUG
Your URL slug is the part of the URL after your domain name. For example, the URL for this blog post is www.productiveblogging.com/ first-post-WordPress-block-editor. The URL slug is first-post-WordPress-block-editor. By default the slug will contain all the words in your title. You generally want to shorten this to just a few keywords – this will make the URL more attractive when you share it and easier to share in certain contexts (for example in an Instagram post, on a podcast or in a YouTube video). In any case, it’s good practice to keep your slugs short!
To change your slug, simply head over to the right-hand menu and select the DOCUMENT tab. Scroll down to where it says PERMALINK and amend your slug as you wish.
STEP 12: PREVIEW AND PROOF READ
Before publishing your blog post, make sure you preview and proofread it! To preview, simply hit PREVIEW in the top right-hand corner. The preview window will automatically open in a new tab.
Proofread your blog post and make edits where necessary.
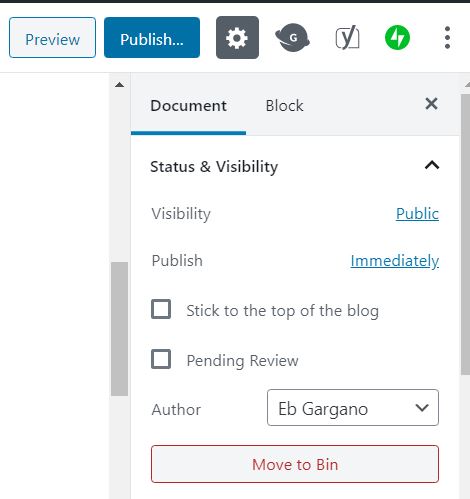
STEP 13: PUBLISH OR SCHEDULE
To publish straightaway, simply hit PUBLISH in the top right-hand corner of your WordPress editing screen.
To schedule your post for a date in the future (or even backdate it to a date in the past!), simply head over to the right-hand menu and select the DOCUMENT tab. Scroll down to where it says STATUS AND VISIBILITY. Click on the word IMMEDIATELY next to where it says PUBLISH and choose your preferred date and time. Then hit SCHEDULE in the top right-hand corner of your WordPress editing screen. Your post is now scheduled for the time and date you selected and will automatically be published at that time.
SPECIAL FEATURES IN THE WORDPRESS BLOCK EDITOR
The WordPress block editor had numerous special features – cool stuff that you just couldn’t do in the old classic editor. Here are just a few of the special features I use most often…
MOVING BLOCKS
If you decide you want to move a paragraph, title, image, quote etc. to a different place in your blog post you can! Hold down the mouse key on the left-hand side of the block you want to move, then drag and drop the block to wherever you’d like it to appear. Alternatively, use the up or down arrows on the left of the block to move it to wherever you want it.
DUPLICATING BLOCKS
If you’ve created a block and you’d like to put that block somewhere else in the same blog post too, simply click on the 3 dots on the right of the popup toolbar and select DUPLICATE. You can now move that duplicate block to wherever you need it to go using the methods described above.
Share
Maybe it’s time your estate agent website had a faster frontend!
Using technologies such as WordPress, Lighthouse, Persistent Object Caching and bleeding-edge server software, it’s now easier than ever!
WordPress Property Drive
A property management plugin for WordPress
Import properties from Property Drive, search, display, filter, sort, and map using our flagship WordPress property plugin.
Import properties seamlessly from Daft, MyHome, Acquaint CRM, Rightmove, Reapit CRM, and more using our custom feed integrations!
WordPress Lighthouse
A pagespeed optimization and performance plugin