4Bids User Manual
Table of Contents
- How To Activate Your 4Bids Account On Your Website
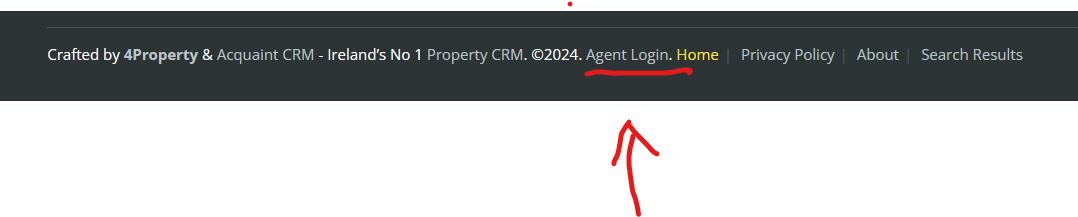
- Step 1. Visit your website and scroll down to the very bottom of the home page and click on Agent Login.
- Step 2. You will be redirected to a login page.
- Step 3. Enter your username and password to access the Dashboard on your website.
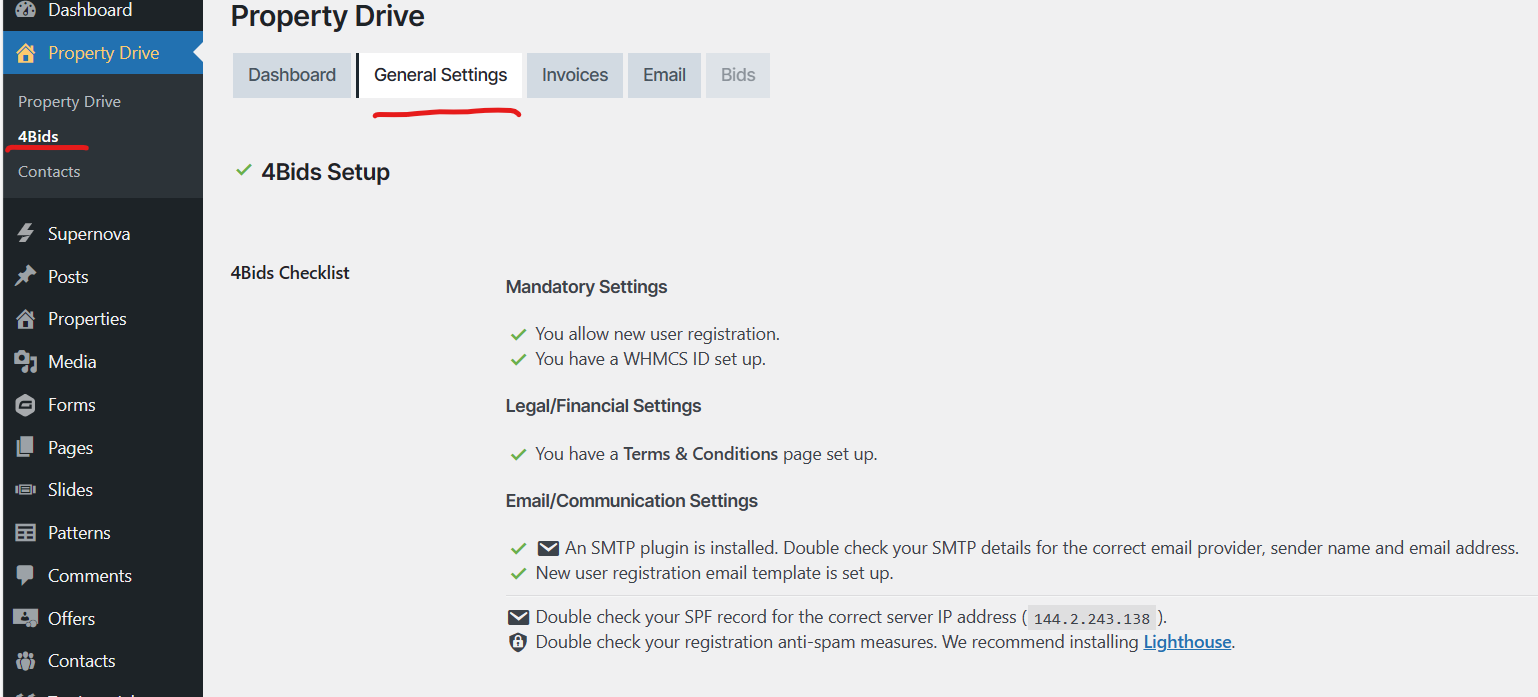
- Step 4. Click on Property Drive -> then select 4Bids, where you will see the 4Bids Dashboard.
- Step 5. Click on the General Settings tab next to the Dashboard tab.
- Step 6. Scroll down the page in the General Settings tab.
- Step 7. Scroll down to the bottom of the page in the General Settings tab to Email Settings.
- Step 8. To Activate A Property For 4Bids To Allow Online Bids
- Step 9. Congratulations! Your property listing is now activated for online bidding!
How To Activate Your 4Bids Account On Your Website
Step 1. Visit your website and scroll down to the very bottom of the home page and click on Agent Login.
Step 2. You will be redirected to a login page.
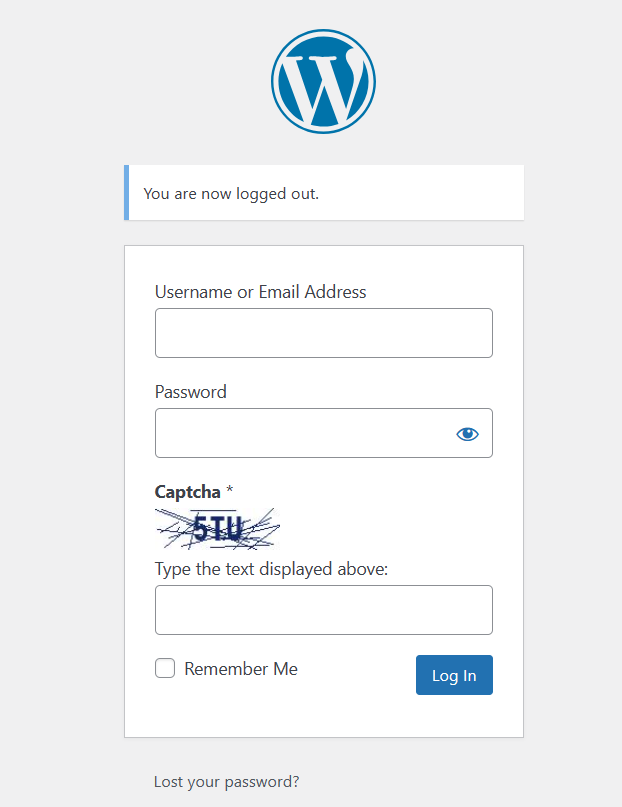
Step 3. Enter your username and password to access the Dashboard on your website.
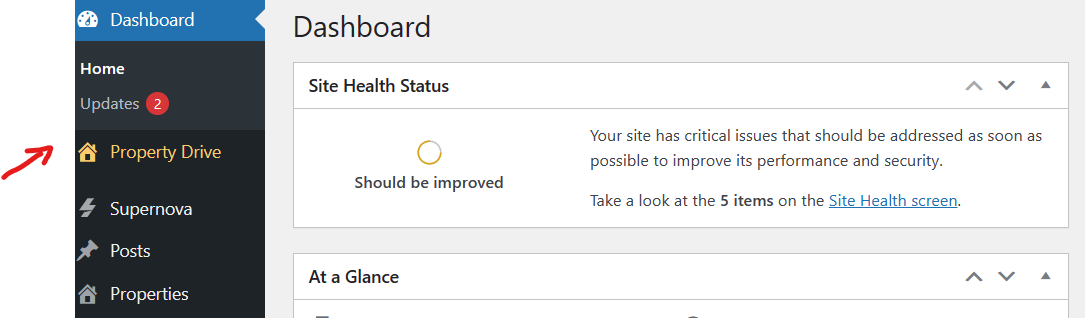
Step 4. Click on Property Drive -> then select 4Bids, where you will see the 4Bids Dashboard.
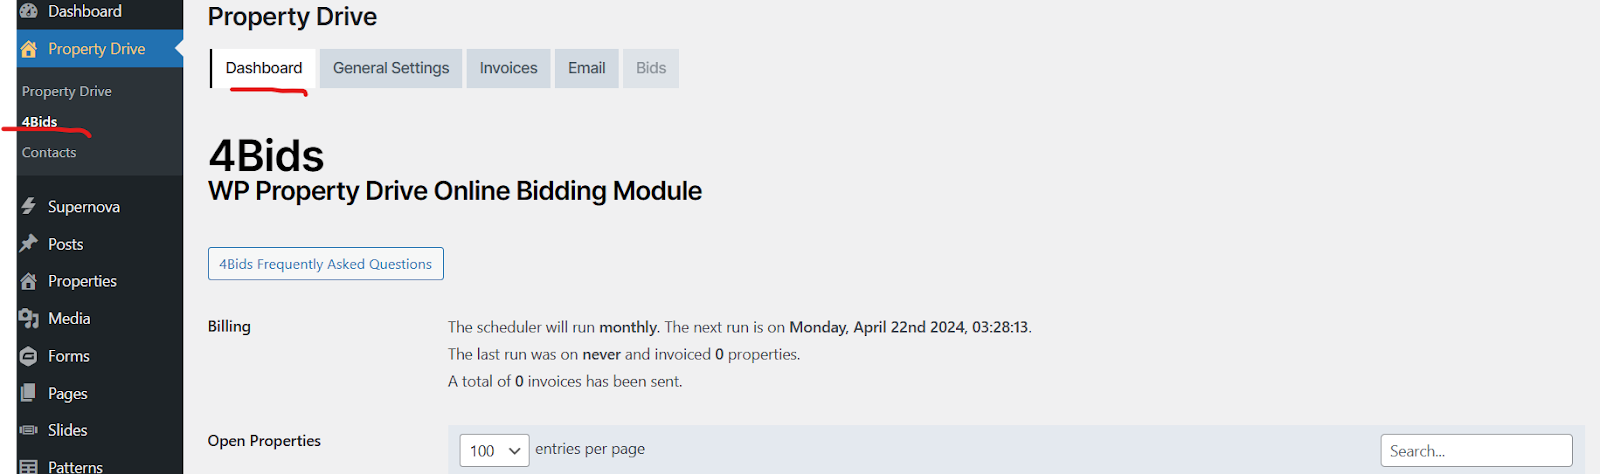
Step 5. Click on the General Settings tab next to the Dashboard tab.
This will allow you to set up the account settings. You will only need to do this part of the process one time.
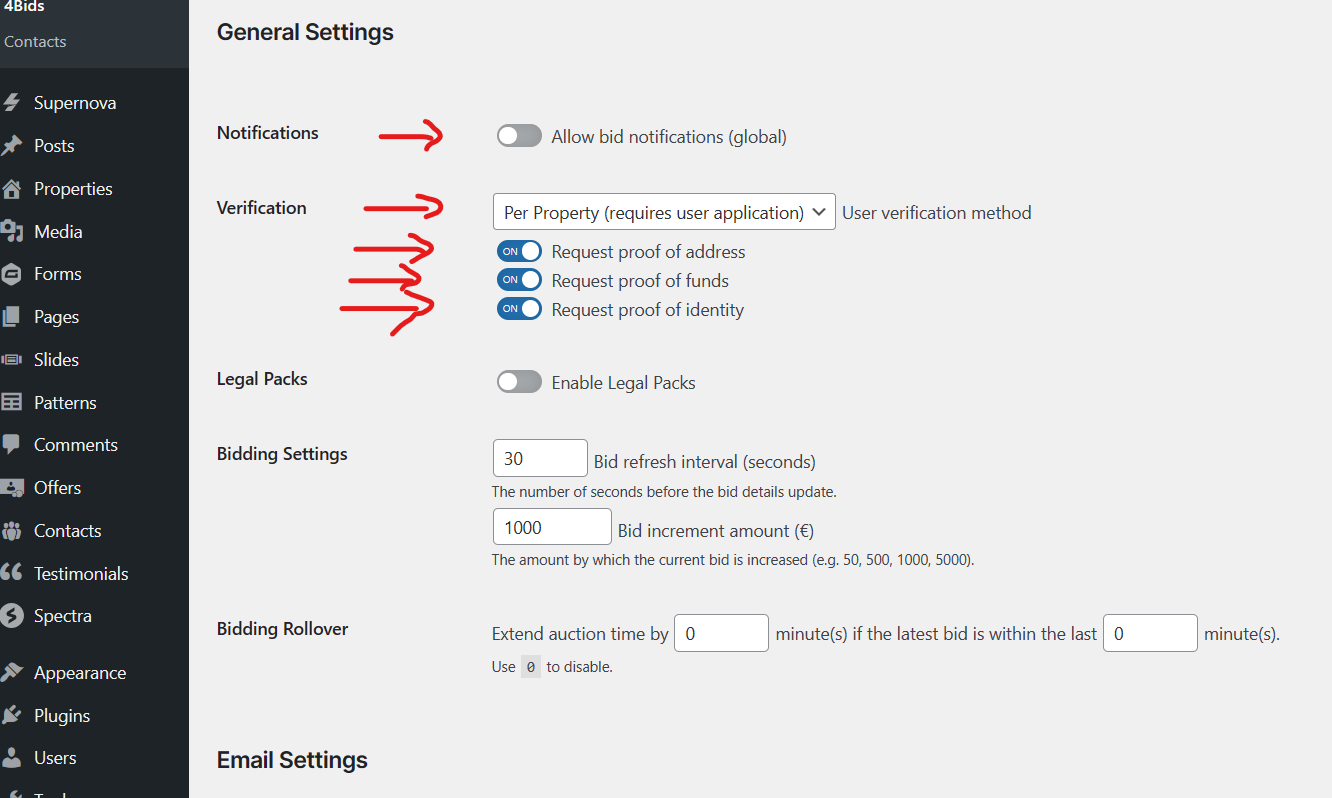
Step 6. Scroll down the page in the General Settings tab.
This will allow you to set up the account settings.
- Ensure the Verification box displays Per Property (requires user application)
- Ensure that the Request for Proof boxes are set to on (this means all applicants must provide this information to have their account approved)
You will only need to do this part of the set-up process one time.
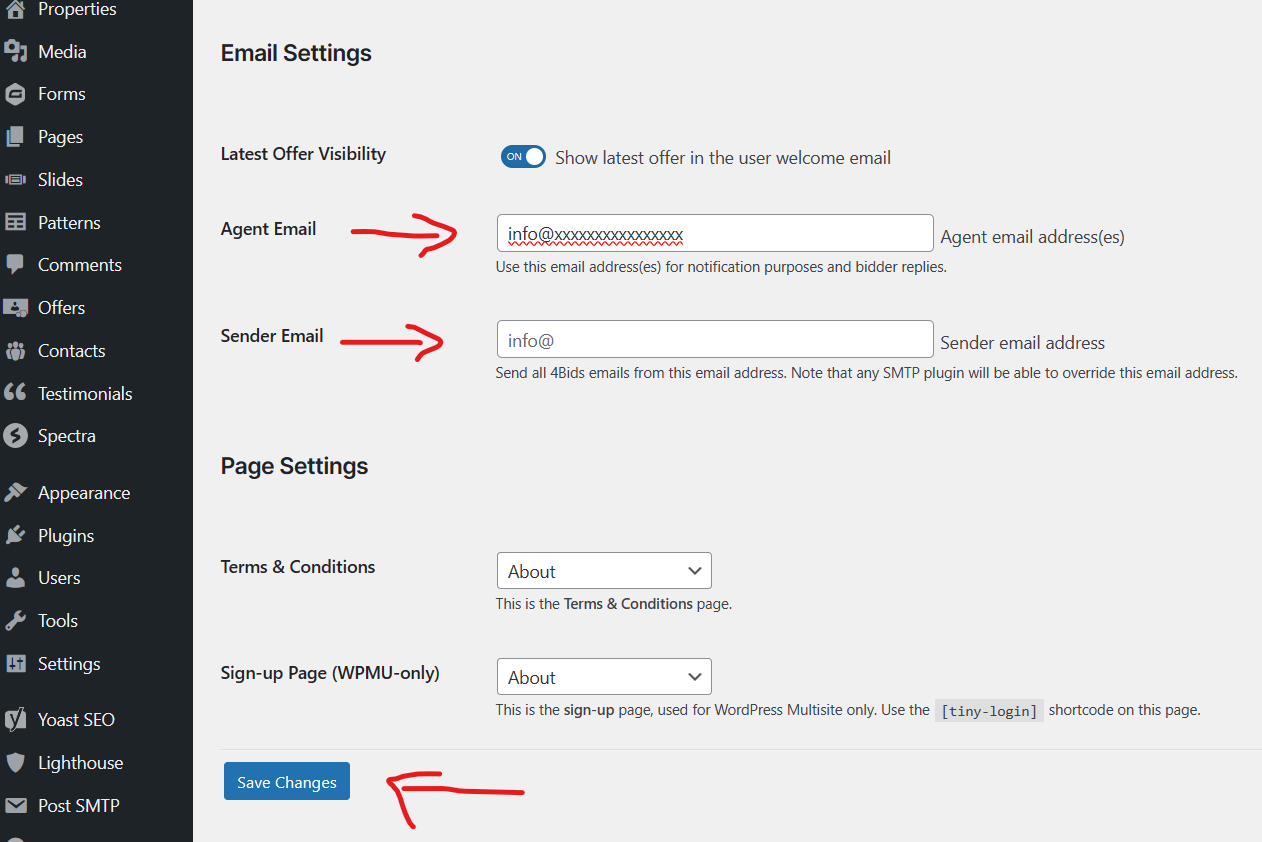
Step 7. Scroll down to the bottom of the page in the General Settings tab to Email Settings.
- Enter agent’s email address (e.g. info@) – this email will receive all notifications
- Ensure that you click Update (blue button)
You will only need to do this part of the set-up process one time.
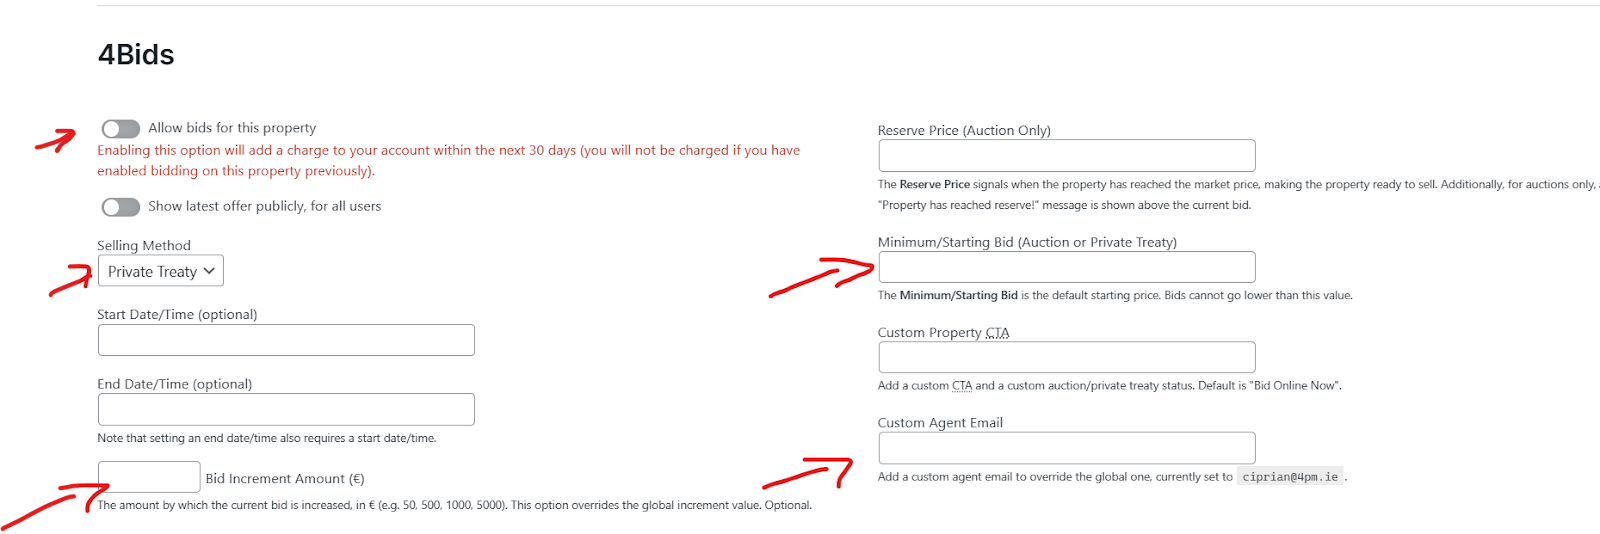
Step 8. To Activate A Property For 4Bids To Allow Online Bids
- Click Properties in the Dashboard. This will display all properties that are listed on your website.
- Hover over and click on the property listing that you want to activate for 4Bids (highlighted in blue).

- The description of the listing will appear. Scroll down to the bottom of the page, where you will see the 4Bids section.
- To activate 4Bids, turn on the Allow bids on this property. Select Private treaty/Auction. The bid increments will be pre-set to €1000 per bid. You can change this amount if you want by entering the new amount.
- You can set a minimum bid amount (may be lower than the asking amount).
- Enter the selling agent’s email address into the box Custom Agents Email. This ensures the selling agent will get notifications on their sale.
- Ensure you press Update (blue button) .
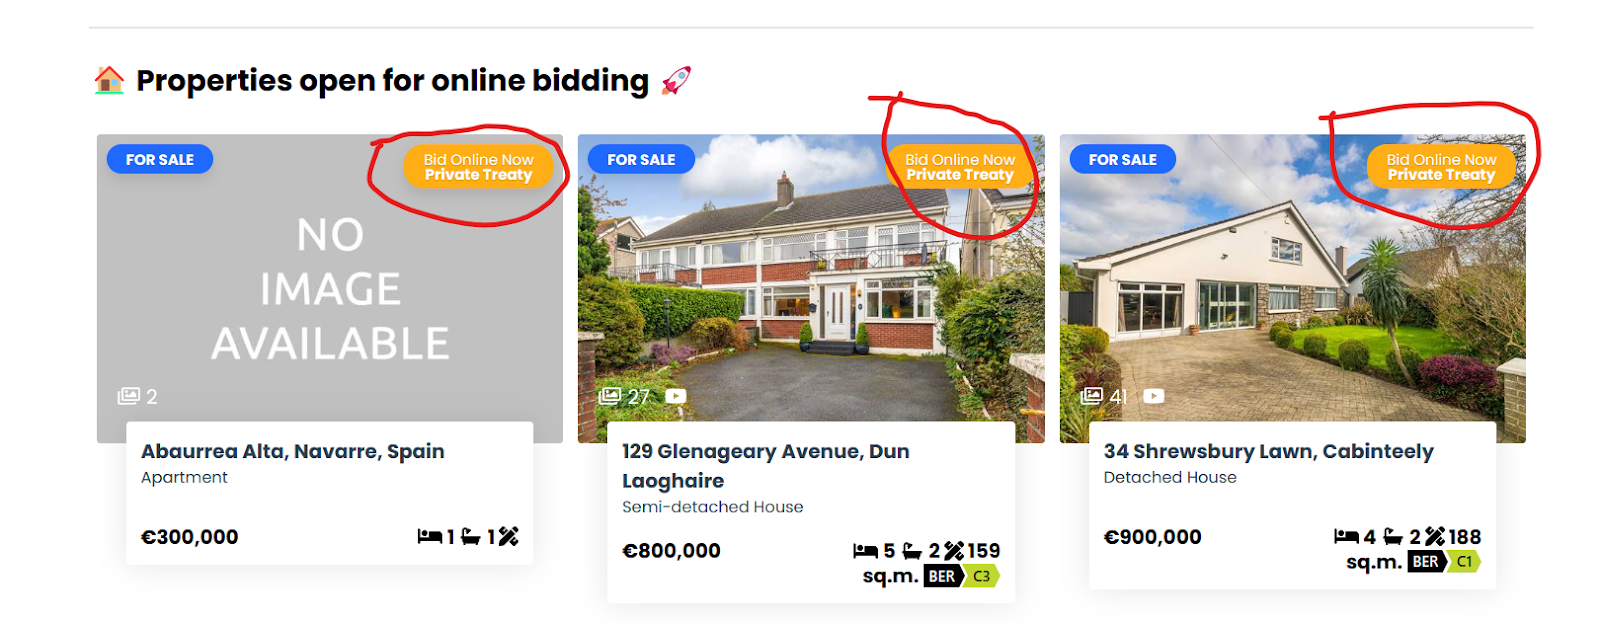
Step 9. Congratulations! Your property listing is now activated for online bidding!
Your property will display the 4Bids badge on the top right-hand corner of the image on the listing.
Share
Maybe it’s time your estate agent website had a faster frontend!
Using technologies such as WordPress, Lighthouse, Persistent Object Caching and bleeding-edge server software, it’s now easier than ever!
WordPress Property Drive
A property management plugin for WordPress
Import properties from Property Drive, search, display, filter, sort, and map using our flagship WordPress property plugin.
Import properties seamlessly from Daft, MyHome, Acquaint CRM, Rightmove, and more using our custom feed integrations!
WordPress Lighthouse
A pagespeed optimisation and performance plugin